Set up an email account in iOS 12
Settings Overview
Set up all email accounts as IMAP – do not use POP.
Incoming Settings:
Server: mail.yourdomainname.com.au
User: name@yourdomainname.com.au
Password: yoursupersecretpassword
Port: 993
Outgoing Settings:
Server: mail.yourdomainname.com.au
User: name@yourdomainname.com.au
Password: yoursupersecretpassword
Port: 465
Additional Settings:
IMAP Prefix Path: INBOX
Step 1
Go to Settings on your iOS device, then scroll down to Passwords and Accounts.
Tap to go in to Passwords and Accounts.

Step 2
Tap on Add Account

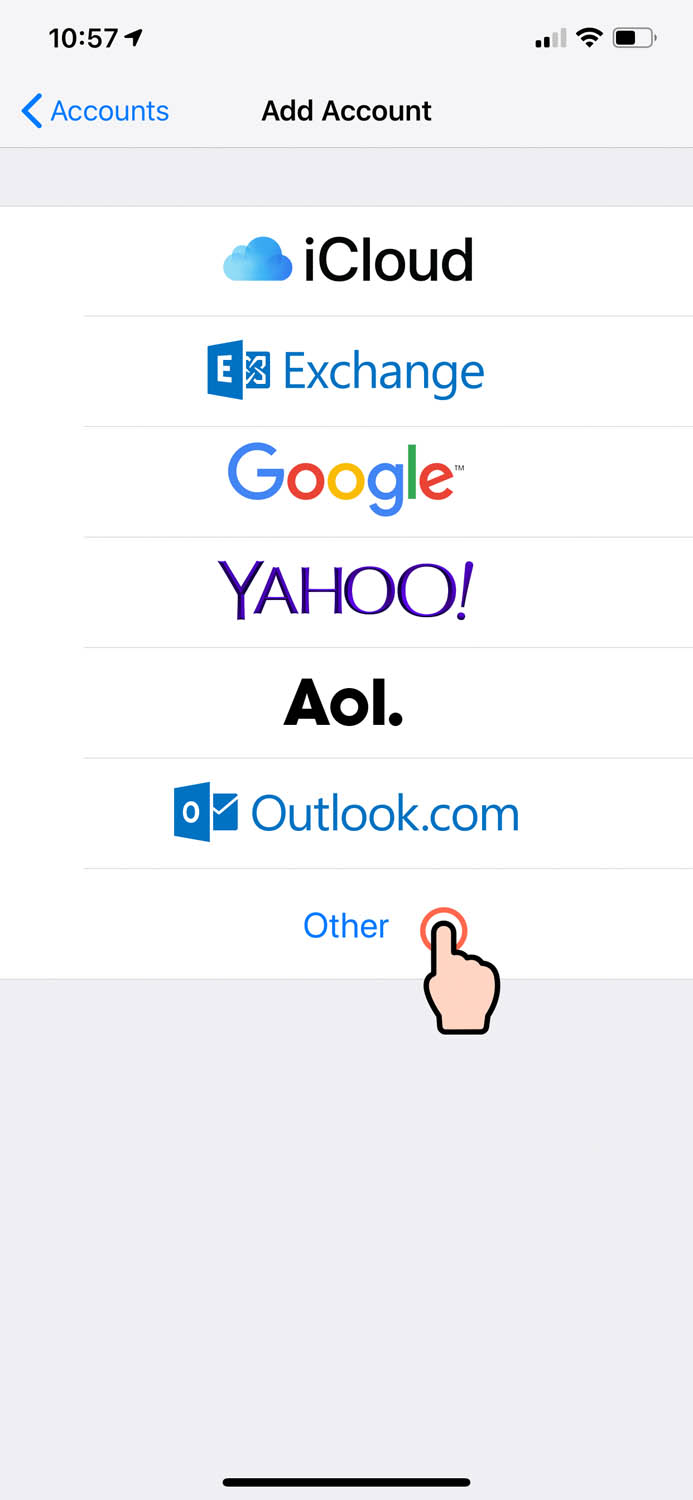
Step 3
Tap on Other
Step 4
Tap on Add Mail Account

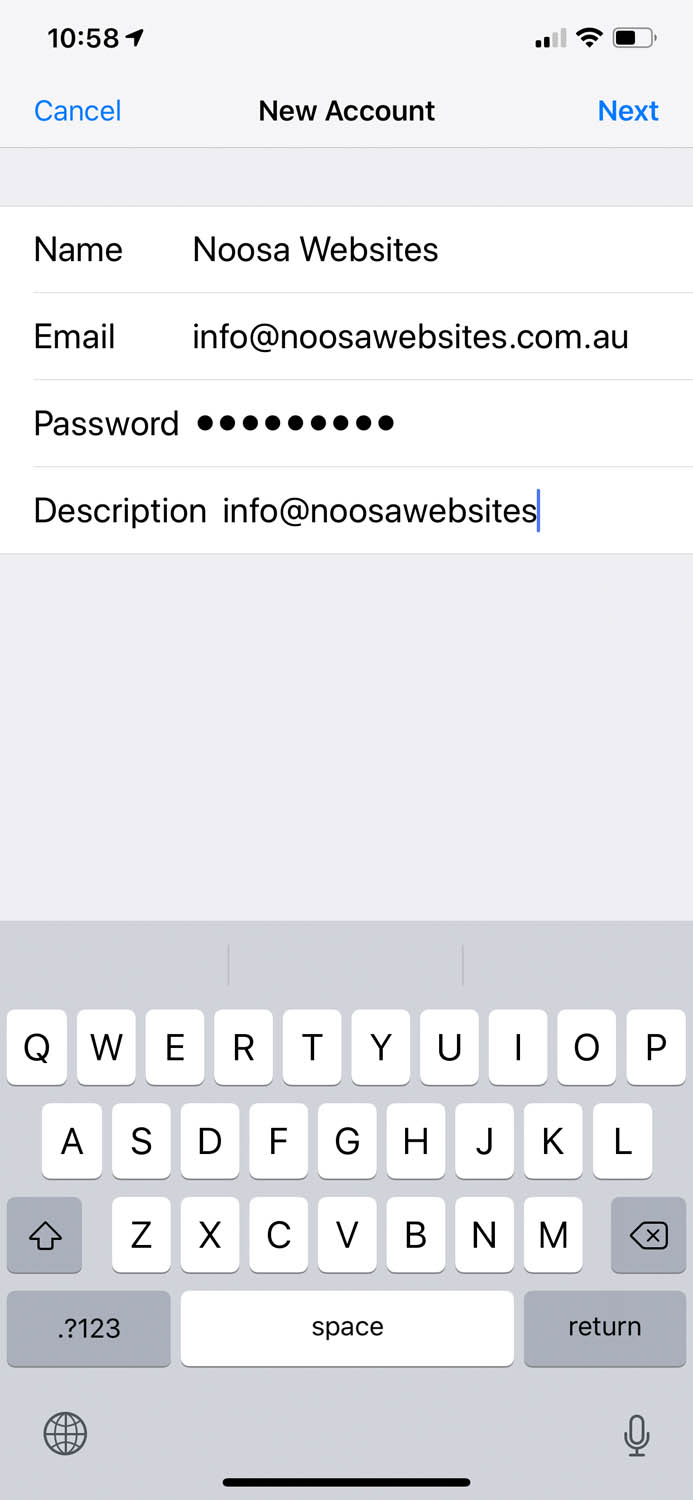
Step 5
Fill in the details:
Name: this is the name people will see when you email them.
Email: your email address – I am using my info@wordpress-652803-4139225.cloudwaysapps.com here as an example.
Password: enter the password for your email account.
Description: Only you see this. This is what is displayed when viewing your list of email accounts in folder view.
Step 6
Fill in the details:
Name: this is the name people will see when you email them.
Email: your email address – I am using my info@wordpress-652803-4139225.cloudwaysapps.com here as an example.
Password: enter the password for your email account.
Description: Only you see this. This is what is displayed when viewing your list of email accounts in folder view.
Click Next at top right.
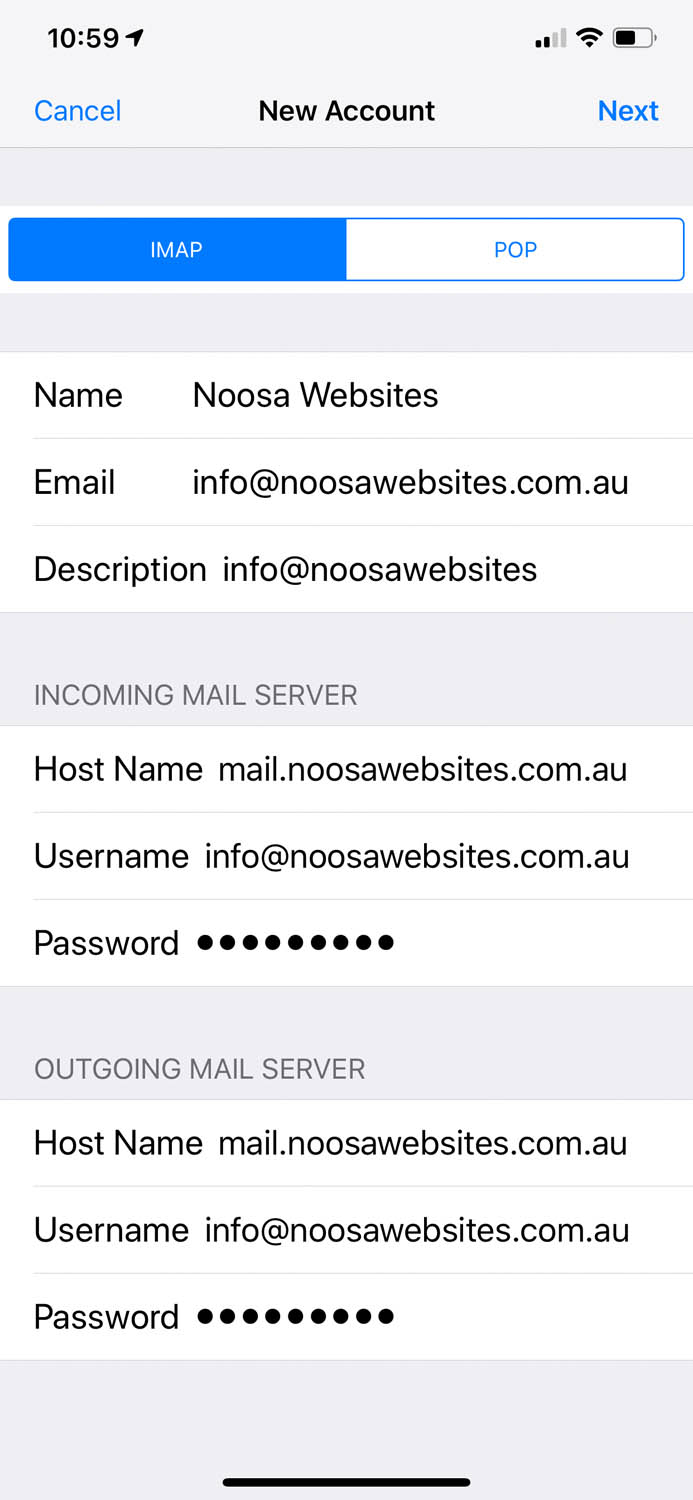
Step 7
This is the second step for your settings.
Make sure the account is set to be IMAP.
Fill in the details:
Name: this will retain settings from page before
Email: this will retain settings from page before
Description: this will retain settings from page before
Incoming Mail Server
Host Name: mail.yourdomainname.com.au
Username: your email address
Password: enter the password for your email account.
Outgoing Mail Server
Host Name: mail.yourdomainname.com.au
Username: your email address
Password: enter the password for your email account.
Click Next at the top right.
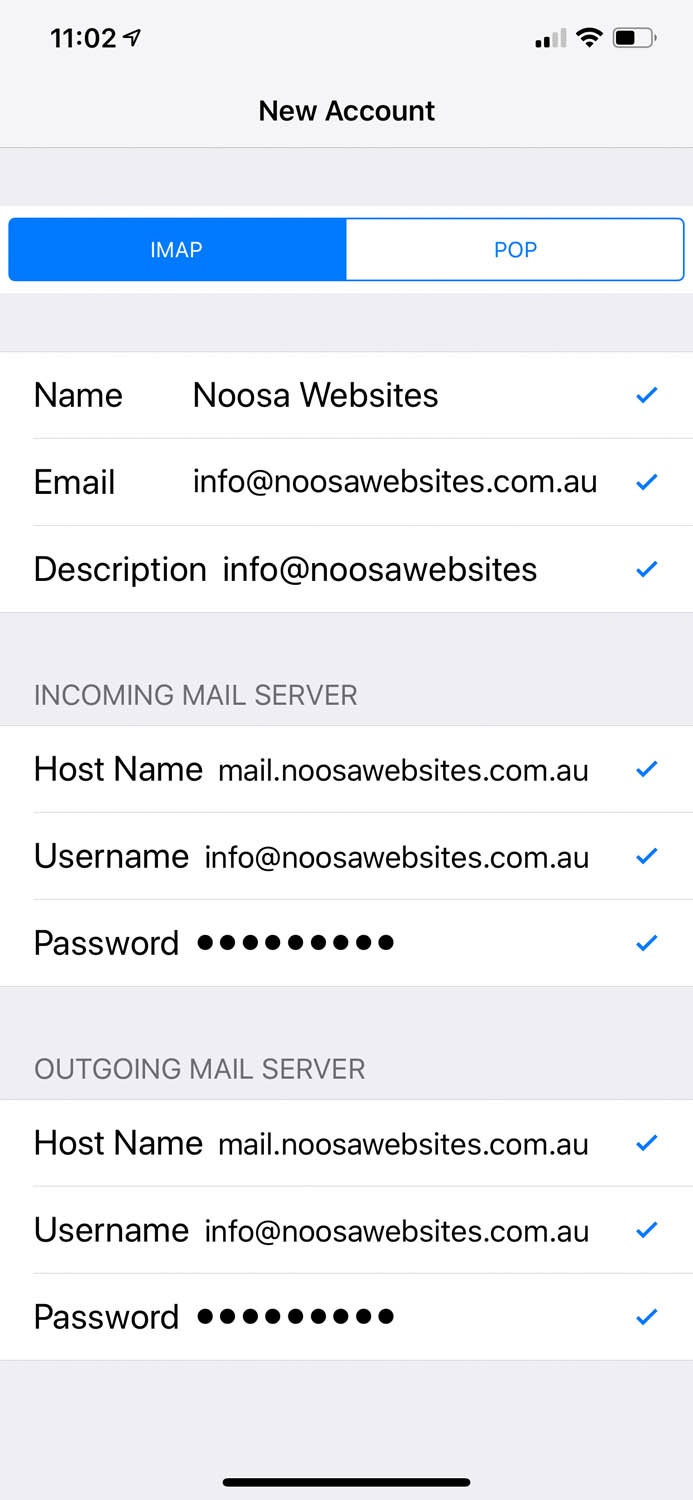
Step 8
After a few seconds, you should get ticks on all fields.
Note: If you get a certificate warning (cannot verify server identity), click continue, then you should see the ticks appear.
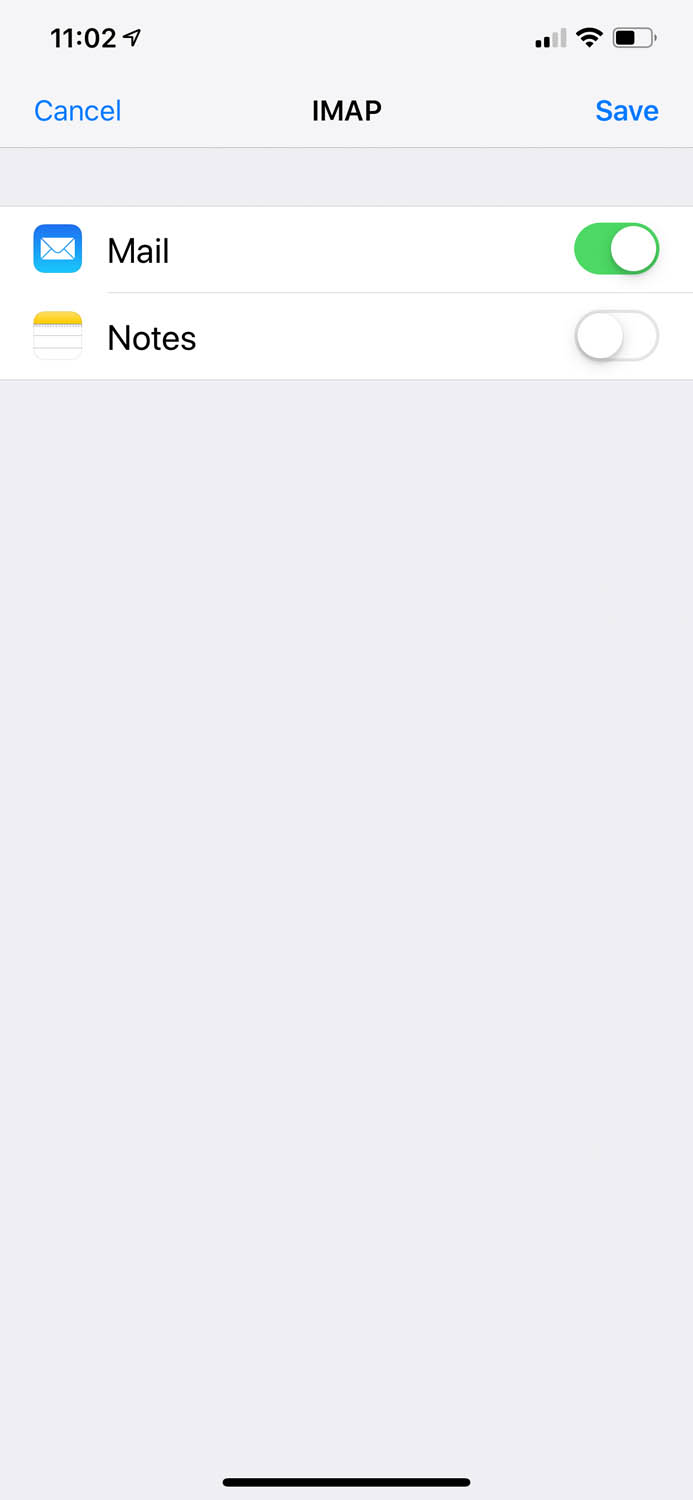
Step 9
Select which feature to use for this account.
I strongly advice to NOT sync notes with your email account and instead sync notes via your iCloud account.
Click Save at top right corner.
Step 10
Additional settings to check.
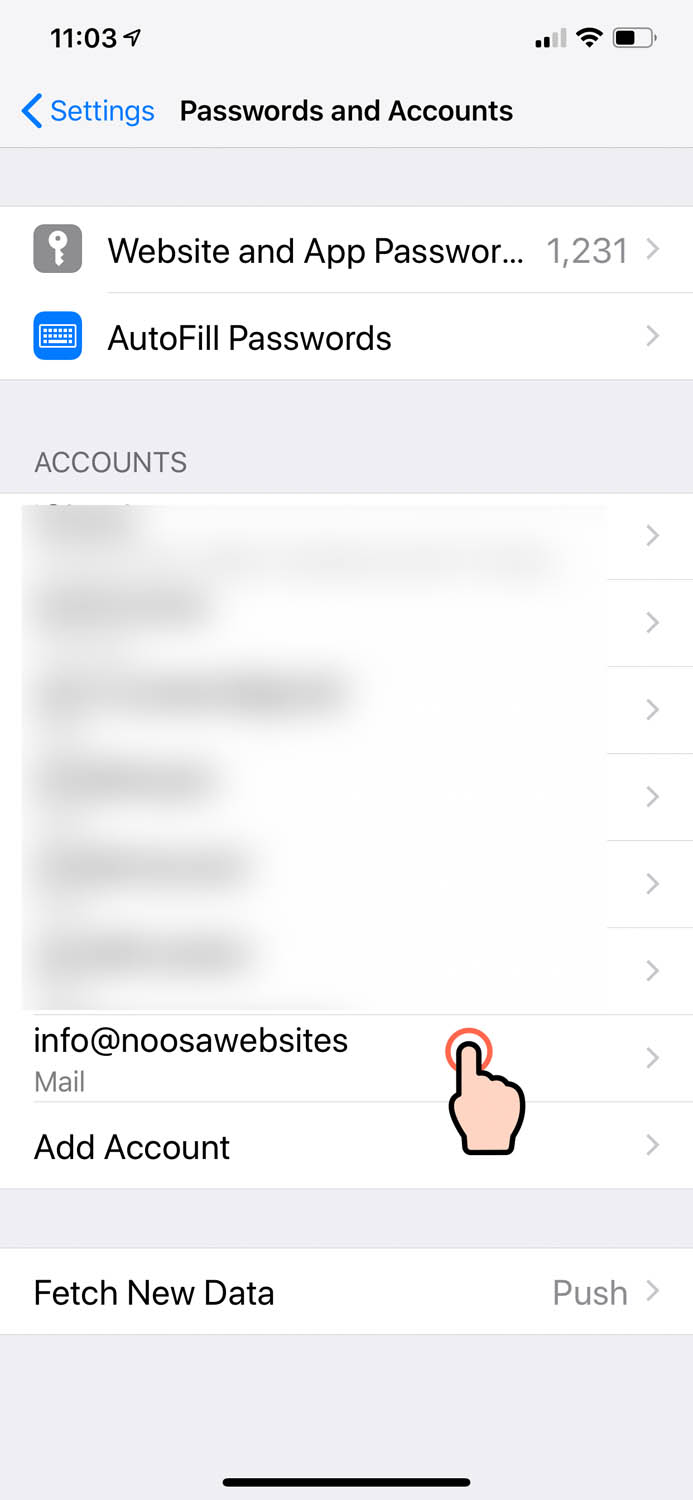
As Mail on the iPhone does not always grab all the correct settings automatically, here are additional steps to take to ensure your email accounts is set up correctly.
After clicking Save in the last step, you will be taken back to your list of accounts.
Tap to go back in to the account you just created.
Step 11
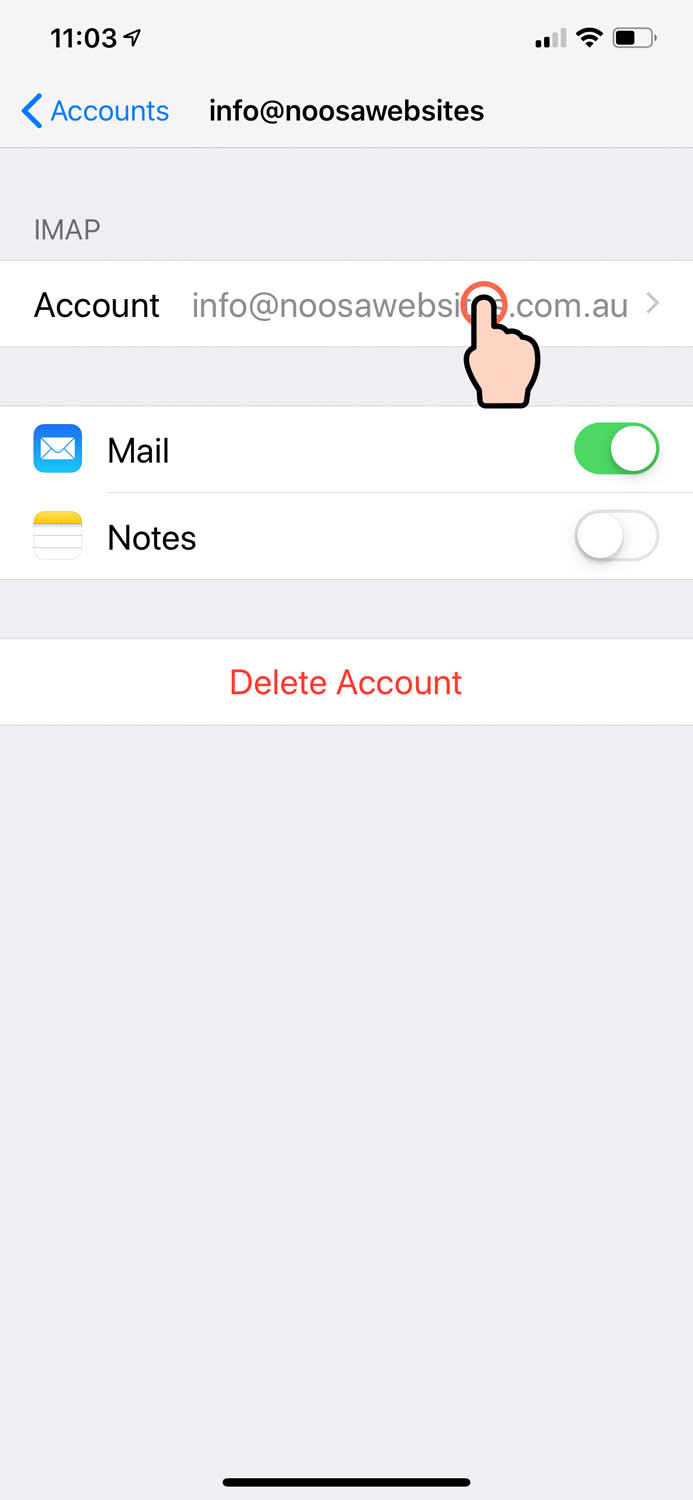
Tap on your email address next to the word Account.
Step 12
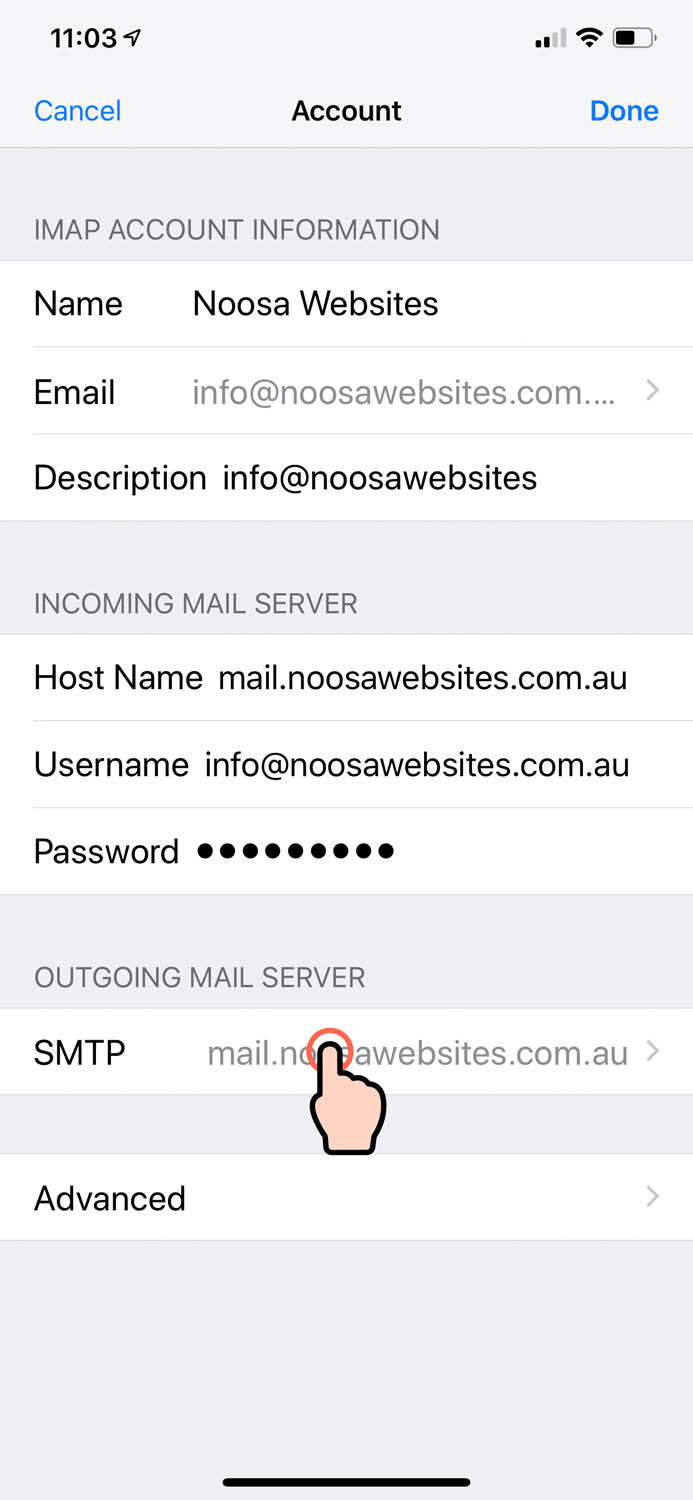
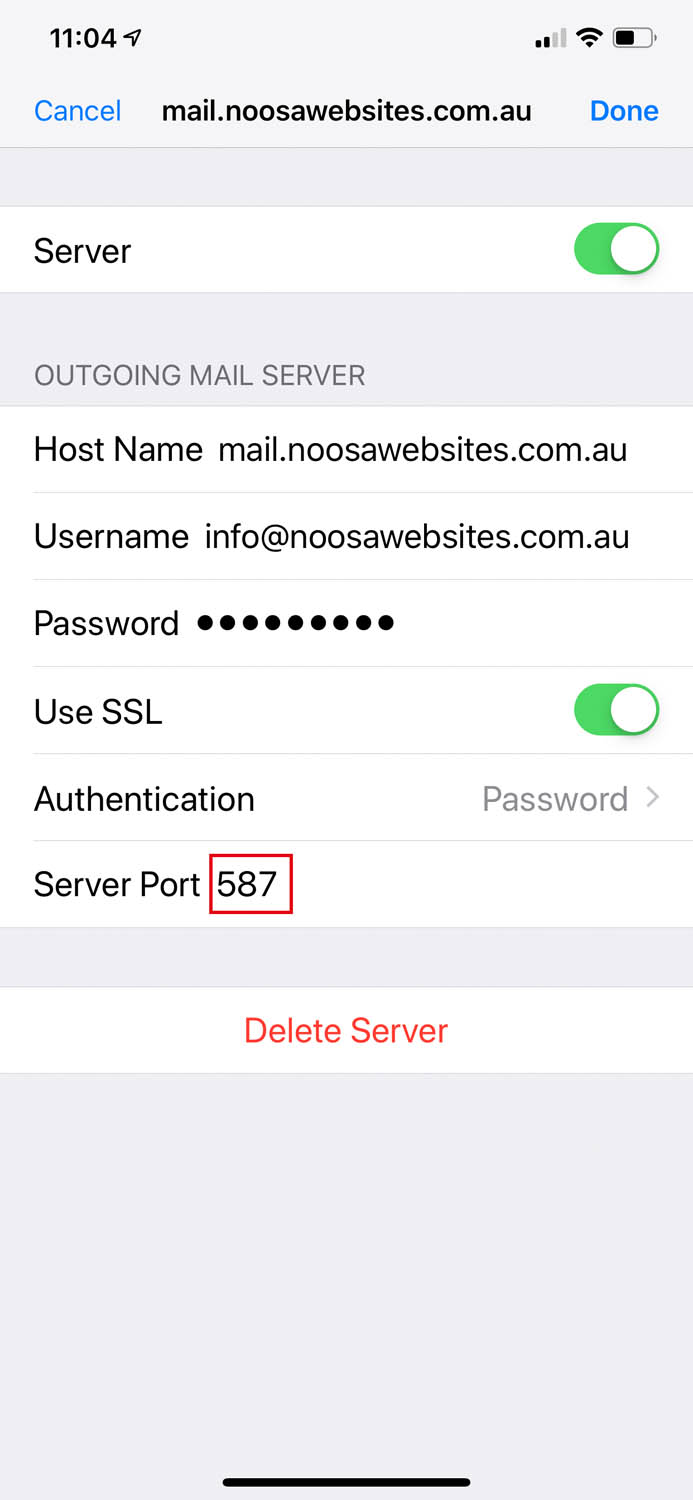
Tap on Outgoing Mail Server then tap on the Primary Server.

Step 13
Make sure the Server Port at the bottom is set to 587 then tap Done at the top right.
Step 14
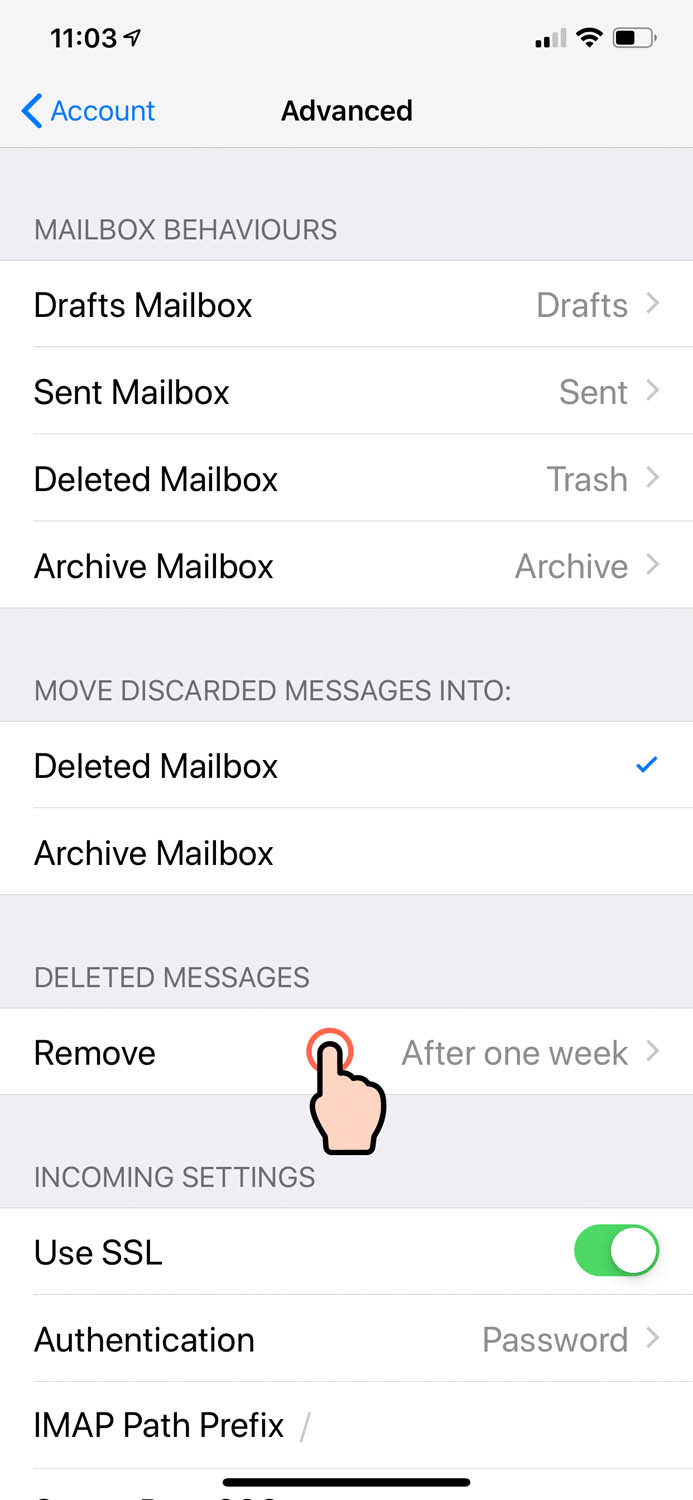
Once back in the email account settings (see Steps 10 and 11 on how to get here), tap on Advanced.

Step 15
This is just a personal preference, but I prefer to have my Deleted Messages removed after a Month, not a week.
Tap here to change this setting if you like.
Step 16
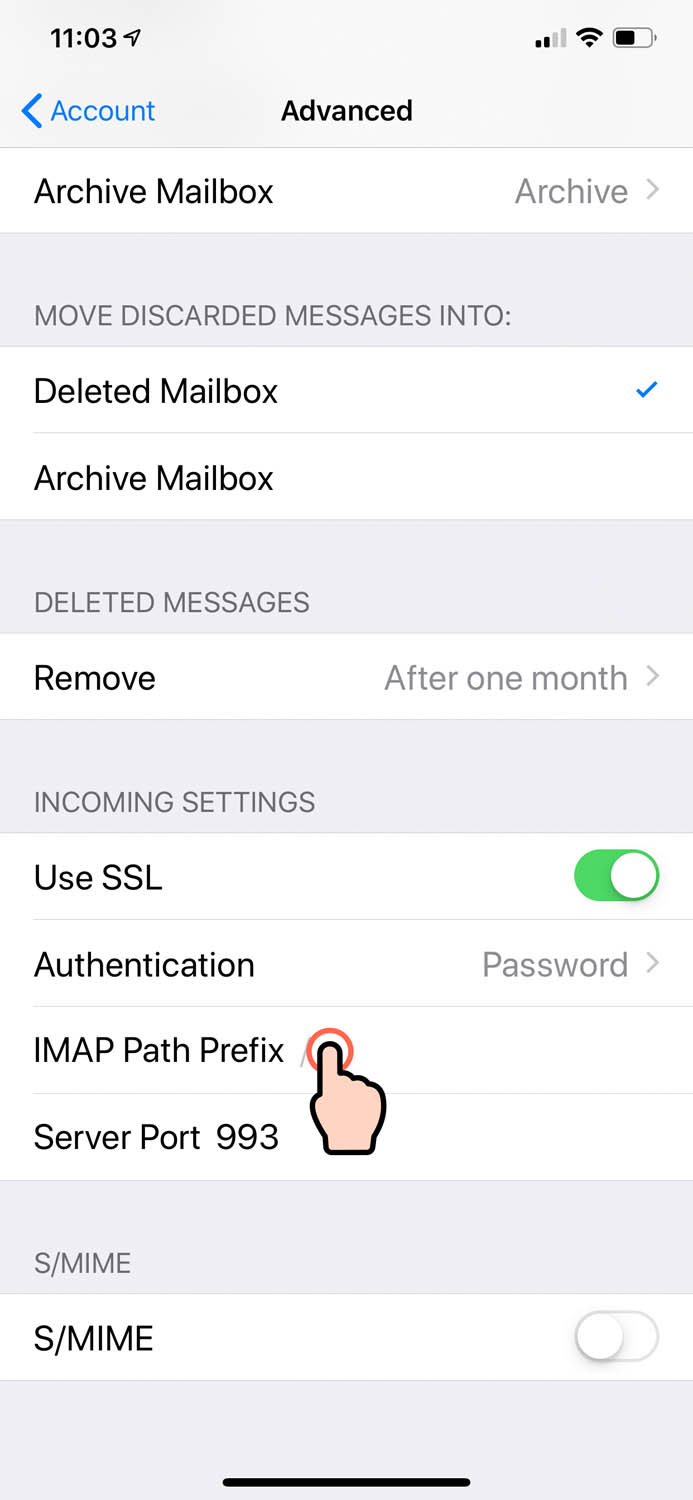
Final Step, scroll down to the bottom of the settings and tap on IMAP Prefix Path.
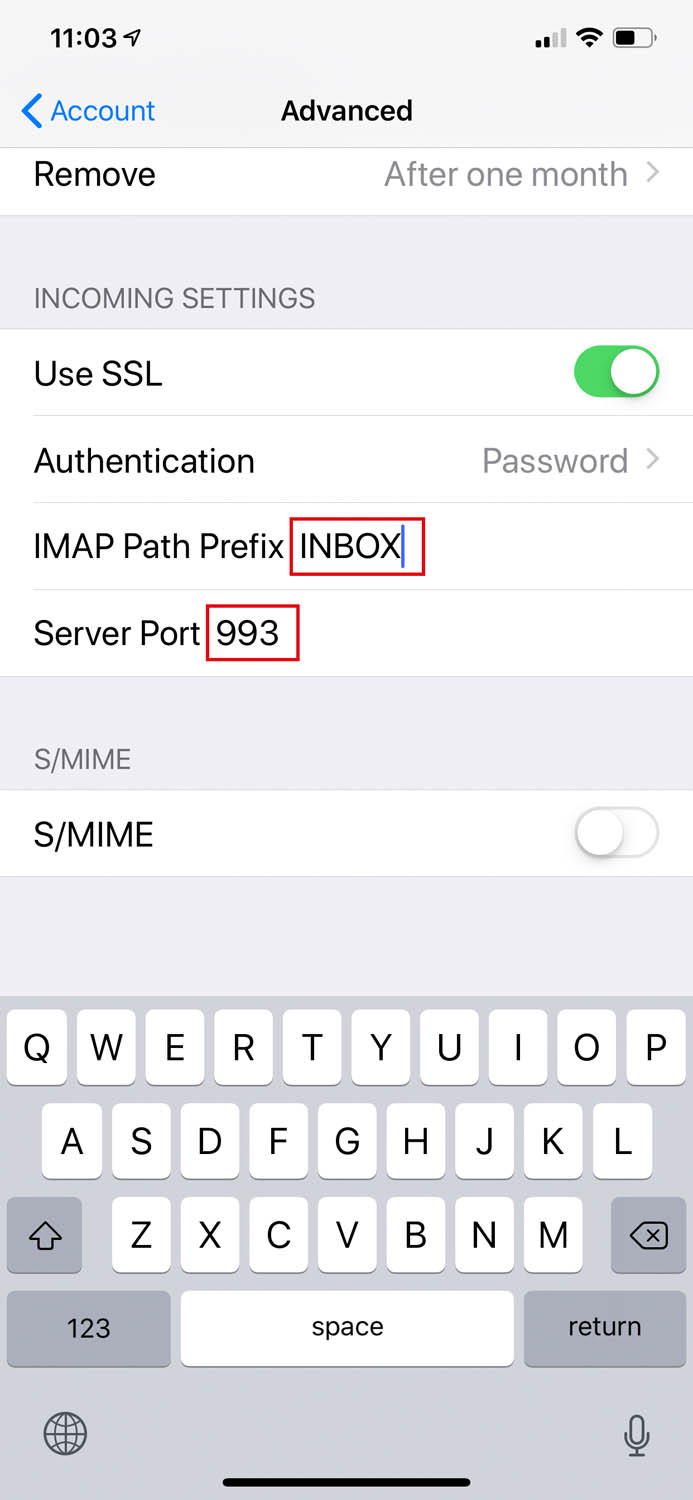
Set this to be: INBOX
Note: this should be in all CAPS.
Then make sure the Server Port is set to 993.
Once this is done, tap Account at the top left to go back a page, then tap Done at the top right to lock in your settings.
You are all set and ready to go.
NOTE: If you are still having issues and your hosting with with Noosa Websites, your IP address might be blocked.
This can happen when you have too many attempts to login with incorrect details as a security measure.
Please go here and note your IP address and get in touch with me to check if it has been blocked.